When it comes to software solutions, user interfaces are often the face of the product. For users, the interface defines their interaction with the software and leaves a lasting impression. Many software providers, like Kolmisoft, offer a default user interface for their products. However, there’s also an option to build a custom interface with your own brand’s unique look and feel and integrate it with MOR using APIs.
In this blog post, we’ll discuss the pros and cons of using the default user interface versus investing in a custom one. We will also showcase a few examples of custom user interfaces for MOR Sofstwitch built by our clients.
The Default User Interface
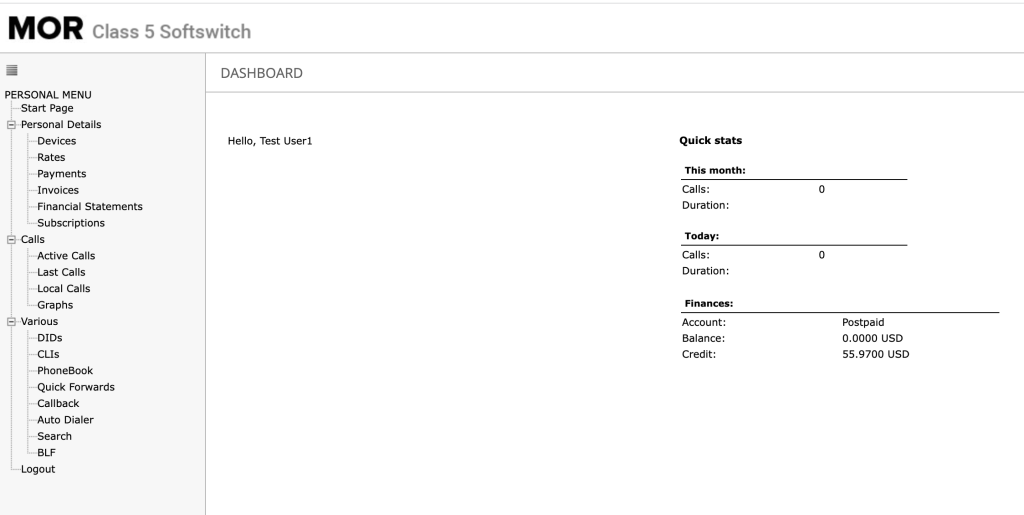
The majority of Kolmisoft clients use the existing MOR user interface, where they can upload their logo, add a company name, platform name/version, copyright information, browser title, front page greeting, and login page text.
In the current MOR interface, users can see their devices, rates, payments, invoices, financial statements, and subscriptions. In the “Calls” menu, they can review various statistics, such as active calls, last calls, local calls, or graphs. Finally, users can manage the call flow to their DIDs, use the quick forwards functionality, and run Auto Dialer campaigns.
Pros:
- Out-of-the-Box Convenience: The interface is ready to use as soon as you start using MOR. It requires no additional development time or resources, making it a convenient choice for those who want a quick setup.
- Proven Usability: The existing interface is well-tested and optimized for a broad user base. It comes with the benefit of proven usability and is designed to meet the needs of most users.
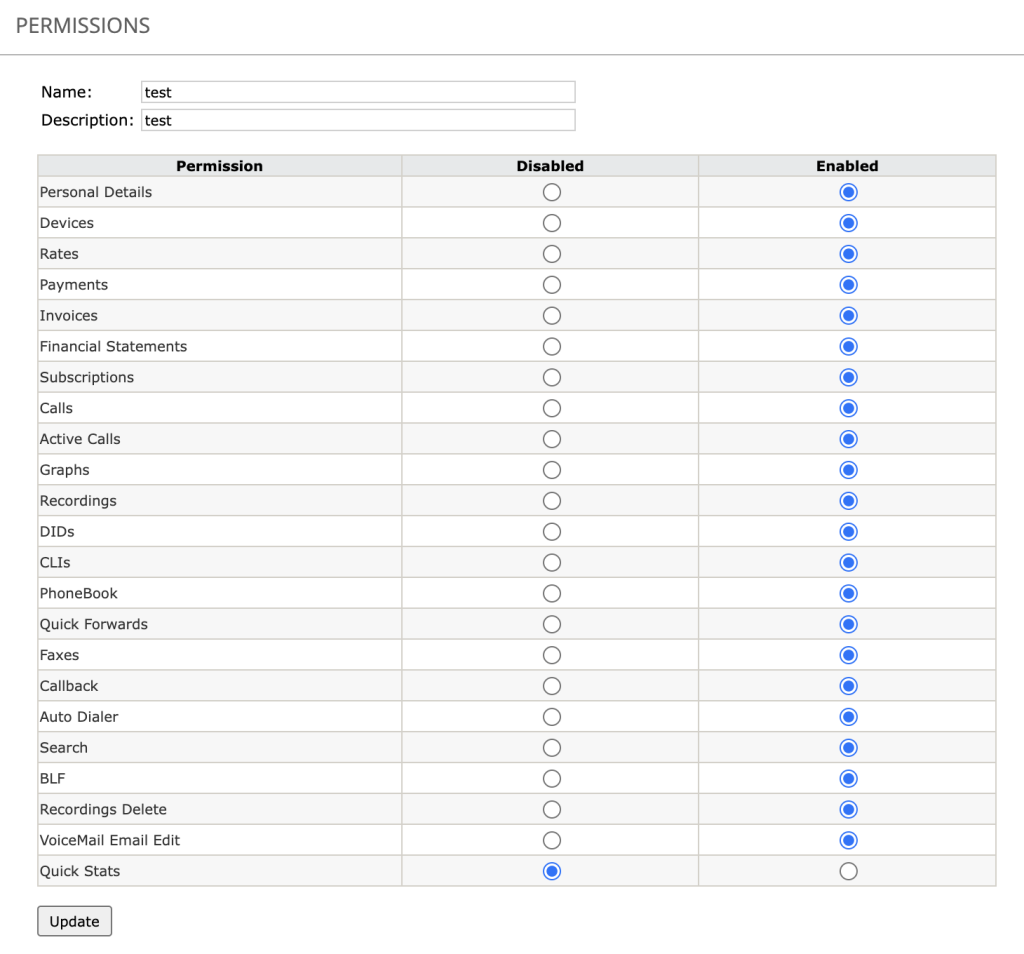
- Control User Permissions: Control what actions a user can perform and what information a user can access in MOR. By configuring MOR user permissions, you can customize the functionality according to your user’s needs and preferences.
Cons:
- Lack of Uniqueness: The default interface may lack the distinctive branding that sets your business apart. It might not fully reflect your company’s identity and values.
- Limited Customization: Even though you can upload your logo, add your company name, and change some text, you have no control over the design and layout, which can be a drawback if your business requires a unique user experience.
The Process of Building Your Own Interface
Building a custom user interface and integrating it with MOR software through an API can be a complex process, but here’s a step-by-step guide to help you get started:
Step 1: Define Your Objectives
Before diving into development, clarify your objectives. What specific features do you want in your custom interface? How should it align with your brand’s look and feel? Identify your goals and set clear expectations for the project.
Step 2: Choose the Right Technology Stack
Select the technology stack (front-end frameworks) that suits your requirements. Ensure compatibility with MOR which accepts API requests by HTML POST and returns results in XML.
Step 3: Design Your User Interface
Work with designers to create wireframes and mockups of your custom interface. Pay attention to user experience (UX) and user interface (UI) design principles to ensure an intuitive and appealing interface. Incorporate your branding elements into the design. Ensure that the interface is responsive and works well on various devices and screen sizes.
If you don’t have your own designer, you can hire one on Upwork or reach out to Kolmisoft partner Kalyan Pasumarthy who has extensive experience in hiring developers and doing integrations with MOR:
CEO @ Moitele | Shri Services Oy
+358449760739
Step 4: Implement API Integration
For any integration between MOR and third-party software (websites, apps, or platforms) you should use MOR API. It allows other software to interact with MOR without knowing its logic and internal database structure. MOR accepts requests by HTML POST and returns results in XML.
Read the MOR API documentation thoroughly to understand how to make requests, and handle responses. Identify the API(s) you need to integrate with MOR.
Step 5: Testing and Quality Assurance
Create a development machine (install MOR test version) where you could test your changes and integrations. Thoroughly test your custom interface and API integration to identify and fix any bugs, issues, or inconsistencies. This includes functional testing, usability testing, and performance testing to ensure a seamless user experience. Implement robust security measures to protect user data and maintain the integrity of MOR. Ensure that your API integration is secure, and users’ sensitive information is adequately protected.
Step 6: User Feedback and Iteration
Gather feedback from a group of beta users or internal stakeholders. Use their insights to make necessary improvements and refinements to the custom interface. Continuously iterate on the design and functionality based on real-world usage.
Step 7: Deployment
When you’re satisfied with the custom interface and API integration on a test server, prepare for deployment. Configure your production server properly, and ensure all dependencies are in place. Deploy the interface to a production environment.
Step 8: Monitor and Maintain
After deployment, closely monitor the performance and security of your custom user interface and the integrated API. Set up automated alerts to detect and address issues promptly. Regularly update and maintain both the front-end and back-end components.
Step 9: User Training and Documentation
Provide training and documentation for your users to help them navigate and utilize the custom interface effectively. Ensure they understand how to access and use the features provided through the integrated MOR API.
Examples of Custom User Interfaces
Our clients understand the power of creating custom user interfaces that not only reflect their brand identity but also cater to their specific operational needs. We’re happy to share a few examples of custom user interfaces crafted by our clients. These interfaces demonstrate the endless possibilities when it comes to personalizing MOR to suit your unique objectives and create a distinctive user journey.
User Interface For Prepaid International Calling Providers
This interface is suitable for prepaid international calling service providers that want to give the following capabilities to their users:
- Free sign-ups
- Easy top-up with PayPal or a credit card
- Instant local access numbers
- Transparent billing with a facility to track balances online.
If you want to learn more, read this blog post that talks specifically about this interface.
Advanced Interface for SIP Trunking Providers
This is an advanced interface for telecommunication service providers that deal with small and mid-sized companies and want to offer:
- SIP trunking
- Creating service packages
- Managing number porting online
- National and international numbers (DIDs)
- Teams Telephone Exchange integration.
Interface For Offering VoIP Service To Expats and Travelers
This interface is suitable for retail VoIP providers who deal with expats and travelers.
- Review your recent calls
- Check rates to A-Z destinations online
- Edit the personal details of your account
- Make a call directly from the web portal
- Top up the balance by using a credit card, Paypal, Bitcoin, or other online payment methods.
Conclusion
Building a custom user interface and integrating it with your MOR through an API is a significant undertaking, but it can yield tremendous benefits in terms of brand identity and tailored functionality. Be prepared for ongoing maintenance and updates as your software evolves and user needs change.